REVIEW · GRAN CANARIA
Panorama Segway Tour
Book on GetYourGuide →Operated by Segway Maspalomas · Bookable on GetYourGuide
Gran Canaria’s south coast has a lot going on. This 1-hour Segway tour turns the busy sights of Maspalomas and Meloneras into an easy, breezy loop with sea views and dune time. You’ll start with a quick Segway setup, then follow a guide along promenades, squares, parks, and palm areas, wrapping up at the lighthouse.
I particularly like the mix of scenery: first the coastline air and views, then the calmer feel of the protected dunes and the palm “oasis” zone. I also like the pace and small-group feel (limited to 8), which helps you actually enjoy stopping for photos instead of just rushing through.
One consideration: the rules are strict. You’ll need solid mobility for mounting the Segway, you must stay within the weight range, and video recording is listed as not allowed—so plan on taking photos rather than filming for content.
In This Review
- Key points at a glance
- Why this Segway tour makes sense on Gran Canaria’s south side
- Getting started: Segway Gran Canaria meeting point and first control check
- Coastal glide toward Meloneras Beach: sea breeze and photo angles
- Entering Maspalomas: squares, parks, and palm groves
- The ravine return and Dunas de Maspalomas Protected Natural Park
- The final arrival: Maspalomas Lighthouse as your stop-and-smile moment
- Price and value: what $65 buys you in real time
- Who this tour fits best (and who should skip it)
- Practical rules you’ll want to know before you go
- The wildlife and photo game: how to spot without missing the ride
- What the guide adds: history, local context, and GoPro documentation
- Should you book the Panorama Segway Tour?
- FAQ
- Where is the meeting point for the Segway tour?
- How long is the Panorama Segway Tour?
- What’s included in the price?
- What are the age and weight limits?
- What items are not allowed during the tour?
- Which languages are available for the live guide?
Key points at a glance
- Small group (up to 8) means less waiting and more time actually riding
- Coastline-to-dunes route: Meloneras Beach to Maspalomas, then into Dunas de Maspalomas Protected Natural Park
- Wildlife spotting moments built into the route (woodpeckers, ducks, macaws—keep your eyes up and steady)
- Quick Segway familiarization at the start so most people get comfortable fast
- Maspalomas Lighthouse finish gives your tour a memorable “end point,” not just a return trip
- Water included (500 ml) helps keep the hour comfortable in the south-coast heat
Why this Segway tour makes sense on Gran Canaria’s south side
Gran Canaria’s south coast can feel like two different worlds. You’ve got the open seafront energy around Meloneras, and then you’ve got Maspalomas’ softer rhythm as you move toward parks, palm areas, and the big natural dune zone.
A Segway fits that “two worlds” feeling better than a normal walk. In an hour, you can cover the kind of ground that usually turns into a long, stop-start shuffle on foot. You still get to look around—especially when the route opens up to ocean views and breezes—without arriving tired.
It’s also a smart way to see Maspalomas with context. The tour is guided, and the guide focuses on history and local details, so you’re not just collecting postcard angles. You’re learning what you’re looking at as you go.
You can also read our reviews of more tours and experiences in Gran Canaria.


Getting started: Segway Gran Canaria meeting point and first control check
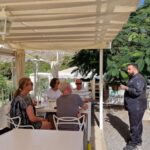
The tour meets at Segway Gran Canaria, at the ramp of parking Varadero, right in front of the perfum shop Aldo. The guide will be wearing a reflective vest, so it’s easy to spot when you arrive.
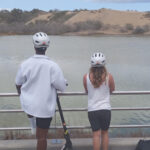
Before you roll anywhere, you’ll get a few minutes to get comfortable with the controls. That matters more than people think. The south coast is scenic, but the whole experience runs on one key skill: staying smooth and confident while steering and maintaining steady speed.
This is one of the best parts of the whole setup. People tend to worry about “getting it wrong,” but the training time is built in, and you’re not thrown into traffic chaos. If your guide is Alex, you may notice he’s big on keeping things organized and helping you feel ready quickly. One thing I like in this kind of setup is that it gives you confidence early, so you can relax once you start seeing the coastline.
Practical tip: wear shoes you’re comfortable controlling the Segway with. High-heeled shoes are not allowed, so think closed-toe, secure footwear.
Coastal glide toward Meloneras Beach: sea breeze and photo angles
Once you’re set, the tour runs along a scenic stretch of coast. This is where you’ll feel the fresh sea breeze and get those ocean-and-promenade views that make the south coast famous.
As you move, you’ll pass through the kind of spaces that tourists usually walk through without fully noticing: promenades, squares, and parks. On a Segway, you experience these areas like a moving viewpoint. You can look left and right without stopping every two minutes.
Your guide will also talk about the island and focus on Maspalomas along the way. That makes the route feel less like transportation and more like a guided “map in motion.” I like this approach because it turns random scenery into a story: you’re not just moving from point A to B—you understand what makes each zone matter.
Wildlife spotting is part of the experience too. The tour notes call out woodpeckers, ducks, and macaws as possible sights. You’ll want to keep your eyes up, but also be sensible: don’t stare so long that your balance gets shaky. Think quick scan, then continue enjoying the ride.
Entering Maspalomas: squares, parks, and palm groves
After heading along the coast, you reach Meloneras Beach, then you enter Maspalomas. This is where the tour shifts from open sea views to more sheltered, park-like atmosphere.
Inside Maspalomas, the emphasis moves to the public spaces people love: squares, parks, and palm groves. This isn’t just about pretty plants. These areas are the connective tissue between the town’s walkable zones and the bigger natural features behind them.
If you’re the type who likes to understand a place visually, this segment is a good one. Palms, parks, and open squares create a mix of light and shade, which makes photos easier to get without the harshest sun at every turn. Also, it’s the part of the ride where you’ll feel like you’re traveling through a curated mix of town and nature.
The guide’s commentary helps here. When you learn the island context while you’re seeing the actual areas, the tour stops feeling like a checklist. You start recognizing what’s planted, what’s shaped, and what’s protected.
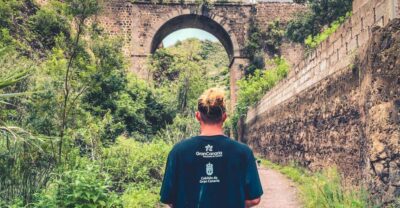
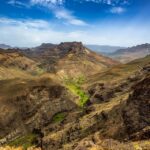
The ravine return and Dunas de Maspalomas Protected Natural Park
Toward the middle-to-late part of the tour, you return through a ravine. This transition matters. It signals that you’re leaving the more manicured public areas and heading into the protected natural park experience.
Then comes the big visual payoff: Dunas de Maspalomas Protected Natural Park. The tour highlights include a pond area and an oasis of palm trees. Even if you’ve seen dunes in photos before, experiencing them in person is different because of scale and texture. Sand and wind behavior are hard to capture in a static picture.
This part also changes the vibe. You’re still on a Segway (so you’re not trudging through sand on foot), but you’re in an environment that feels more quiet and “away” from the street. That’s why it works as a second half of the ride after the coastline segment.
Photo note: you’ll want your camera/phone ready, but you need to follow the rules. Video recording is listed as not allowed, so plan on photos rather than filming your full route.


The final arrival: Maspalomas Lighthouse as your stop-and-smile moment
The tour ends at the Maspalomas lighthouse. I like having a strong finish point because it stops your brain from doing the usual traveler thing—wondering where you are and whether you’re close to being done.
The lighthouse is imposing, and it gives you something to anchor your memories to. By the time you arrive, you’ve already seen Meloneras Beach, Maspalomas’ palms and parks, and the dunes zone—so the lighthouse doesn’t feel random. It feels like the natural “cap” on a route that moved from coast to nature.
For families and couples, this is the part that typically makes people want to slow down for a few extra shots. It’s also where you can compare notes with your guide: you’ll likely have a better sense of the geography than when you started.
Price and value: what $65 buys you in real time
At $65 per person for a 1-hour guided experience, the value comes from how much you cover and how much guidance you get while you’re moving.
Walking the same mix of coastline segments, town squares, park zones, and dunes would take a long time, and you’d probably lose the relaxed “see it all” feeling. A Segway compresses that distance into a manageable hour while keeping you engaged with the guide’s history and local explanations.
A heads-up on one cost detail: there’s a €300 deposit listed. That’s not part of your $65 ticket price, so check how that deposit is handled before you go. Think of it like a security hold that you need to plan for, especially if you’re traveling with limited cash flow.
Included extras also help value. You get a helmet, the Segway, and 500 ml water. Those are small items, but they remove friction from the experience—no need to scrounge for gear right at the start.
Small group size (max 8) is another value driver. With fewer people, you spend less time waiting for others to mount or get sorted, and you get more time to ask questions while you’re actually in motion.
Who this tour fits best (and who should skip it)
This is best for people who want movement without stress. If you like scenic rides, a guide telling you what matters, and a clear itinerary with a satisfying finish, you’ll probably enjoy it.
It’s also a great fit for first-timers on Segway. One practical point from past experiences: people tend to get comfortable quickly once the guide helps at the start. If you’re nervous, arrive on time so you don’t feel rushed during the control familiarization.
Who should be cautious or skip it:
- Children under 10 are not suitable.
- Pregnant women are not suitable.
- People with mobility impairments are listed as not suitable, even though the activity is marked wheelchair accessible—so if that applies to you, confirm carefully with the provider before booking.
- Weight limits apply: not suitable under 66 lbs (30 kg) or over 260 lbs (118 kg).
- Not suitable after recent surgeries.
- People over 70 years are listed as not suitable.
In other words: this is built for active riders who can handle the Segway safely for the duration.
Practical rules you’ll want to know before you go
These tours work best when you treat the rules as part of the experience, not an afterthought. Here are the key ones that affect how you’ll pack and what you’ll do during the hour:
- No high-heeled shoes. Wear secure, closed-toe footwear.
- No food in the vehicle. Plan to eat before or after the tour.
- No alcohol or drugs. Keep it clear-headed.
- Video recording is not allowed. Photos should be fine, but don’t count on filming.
If you’re the kind of traveler who loves documenting trips, this one is still photo-friendly—just manage expectations. I’d bring your phone charged and ready for pictures, and skip the plan to record everything like a vlog.
The wildlife and photo game: how to spot without missing the ride
You’re told to keep your eyes peeled for woodpeckers, ducks, and macaws. Realistically, wildlife sightings aren’t guaranteed, but you can improve your odds by using a simple approach:
- Scan quickly when your guide slows or stops.
- Check ahead and to the side, not just straight up.
- Don’t brake your balance to stare—stay steady and let your eyes do the work.
For photos, focus on the changing scenery rather than trying to capture one perfect “everything” shot. The route naturally rotates between sea views, town greenery, dunes, pond/oasis moments, and the lighthouse finish. If you shoot with that sequence in mind, you’ll end up with a better set of memories.
What the guide adds: history, local context, and GoPro documentation
A big reason these tours feel worth it is the human layer. The guide doesn’t just point; they explain what you’re seeing, with a special focus on Maspalomas.
And there’s an added charm factor: one guide, Alex, is noted for documenting the tour using a GoPro with images and clips. If your guide uses that method, it’s a nice bonus because you get a second way to remember the hour—beyond your own phone photos.
Even without that, the real value is having someone explain the area while you glide through it. It turns the ride into a guided walk that happens to be on wheels.
Should you book the Panorama Segway Tour?
Book this if you want:
- a 1-hour guided way to cover Meloneras and Maspalomas without a long hike
- a mix of coast + town + protected dunes
- a small group, Segway familiarization, and a clear finish at Maspalomas lighthouse
- a guided history angle, not just sightseeing motion
Skip it if:
- you don’t fit the stated age/weight/mobility limits
- you’re counting on full video recording (it’s listed as not allowed)
- you’re uncomfortable handling a Segway for the duration
My take: for $65, the real value is time saved plus guidance received, all wrapped into a route that ends at a memorable landmark. If you’re in Gran Canaria’s south area and want a fun, efficient way to see more than just one neighborhood, this is a strong pick.
FAQ
Where is the meeting point for the Segway tour?
The guide meets at Segway Gran Canaria, at the ramp of parking Varadero, in front of the perfum shop Aldo. You’ll see the guide wearing a reflective vest.
How long is the Panorama Segway Tour?
The tour lasts 1 hour.
What’s included in the price?
Included are a helmet, the Segway, and 500 ml water.
What are the age and weight limits?
Children under 10 are not suitable. Riders must be within 66 lbs (30 kg) to 260 lbs (118 kg). People under 30 kg or over 118 kg are not suitable.
What items are not allowed during the tour?
The tour lists high-heeled shoes as not allowed, along with food in the vehicle, alcohol and drugs, and video recording.
Which languages are available for the live guide?
The live tour guide is available in English, French, and Spanish.